
Crop a landscape photo into a square without stretching the subject
Use the visual crop editor or exact percentages to frame a square thumbnail, then check the real downloaded image.
Updated November 4, 2026 · instructions, sample example and troubleshooting reviewed.
A square thumbnail should keep the subject in view without stretching a landscape photo. Filerivo’s Crop an image removes the surrounding area. Its advanced editor shows where the cut will fall, while percentage fields let you repeat a precise crop.
Try the crop before choosing a real profile photo
The downloadable image is 1200 × 800 pixels. Its circle and corner labels make it easy to spot stretching or clipped content.
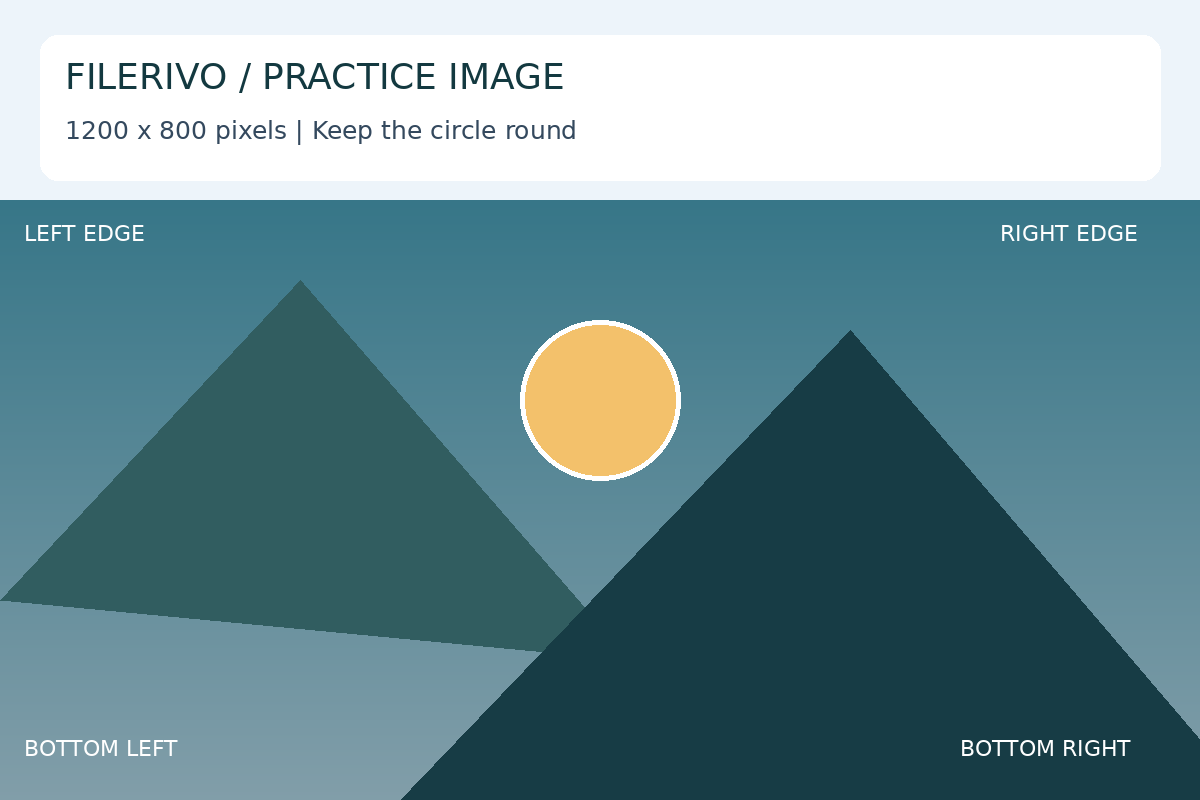
Original Filerivo demonstration files with made-up details. These settings are a recipe to try, not an automatic preset or a promised size saving.
- Open Crop an image and choose the sample PNG. Select Square in Advanced crop editor.
- Expand the square to the full image height and center it. This retains about 800 × 800 pixels and removes about 200 pixels from each side.
- For percentage entry, use Top 0%, Height 100%, Width about 66.67%, and Left about 16.67%. Percentages are rounded, so inspect the reported pixel dimensions.
- Choose Apply, Preview, then Download the square and inspect its center and edges at the intended display size.
- Expected result
- A square PNG approximately 800 × 800 pixels. The circle stays round; the left and right edge labels are intentionally outside the crop.
- Check the downloaded copy
- If a destination needs exactly 400 × 400 pixels, resize the cropped copy to 400 × 400. Check its own circular/profile preview as well.
Try a centered square with exact numbers
Suppose your original is 4000 × 3000 pixels. A centered 3000 × 3000 crop uses Left 12.5%, Top 0%, Width 75%, Height 100%. The left offset removes 500 pixels; the retained width is 3000 pixels. The same percentages work for another image with the same 4:3 proportions, but its output pixel count will differ.
Width and Height percentages refer to the original image’s separate dimensions. Setting both to 75% does not make a rectangular original square. Use the Square preset when you want the editor to calculate the proportions for you.
Position the subject before downloading
- Keep your original. Open Crop an image and select one JPG, PNG, or WebP image.
- Open Advanced crop editor, which is dimmed until a file is selected. Choose Square. Other presets include Free crop, 4:3, 16:9, and Original ratio.
- Drag inside the crop box to position it. Use a corner or side handle to resize it. Leave space around hair, ears, or a product’s edges rather than cutting tightly against them.
- Check the synchronized Left, Top, Width, and Height percentage fields and the approximate output dimensions. For the 4000 × 3000 example, enter the values above to retain the largest centered square.
- Crop and download, then open the downloaded image. Check the actual framing and pixel dimensions before uploading it to the destination.
The editor updates the crop fields directly; there is no separate advanced-download checkbox for this tool. With its canvas focused, arrow keys move the crop by one percentage point, and Shift plus an arrow moves it by five. Full image restores the whole image. Selecting a new file or switching tools clears unsaved edits.
Choose what to keep, rather than forcing a tight crop
A centered square may cut off a subject standing near one edge. Move the box towards that subject and inspect the opposite edge. If two people are too far apart to fit, cropping cannot invent space around them. Use a wider ratio, or try the Resize image advanced canvas editor to place the image on a fixed canvas with a background.
A destination may display a square image through a circular frame. Check that destination’s actual preview: a square crop alone does not guarantee that a face or logo near a corner will remain visible.
Understand the output limits
The crop must have positive dimensions and stay inside the source. Output dimensions are rounded down to whole pixels, with a minimum of one pixel. The preview is a placement aid, not a full-size comparison of the encoded download. Its on-screen size does not determine export resolution.
The output keeps the input format. JPG and WebP are re-encoded, so keep the original and avoid repeatedly cropping already exported copies. Cropping does not add missing detail, enlarge the retained pixels, or guarantee a target file size. If the destination also sets a pixel limit, resize the cropped copy; if it sets a byte limit, try Compress image and inspect the result again.
For a product thumbnail, check all the edges and small lettering. For a profile picture, inspect the face at the size people will see it. Keep the original until the final upload looks right. The crop guide lists the current controls and constraints.
Limits that matter for this task
A crop removes content. It cannot bring an off-frame subject back, add missing detail, or guarantee a byte-size target. JPG and WebP are re-encoded.
Troubleshooting
The square is too small
A smaller crop box selects fewer source pixels. Expand it to the full image height before judging the output resolution.
The subject is cut off
The centered recipe is only a starting point. Move the box toward the subject or use a fixed canvas with a background when a square cannot hold everything.
Width and Height both say 75%, but the result is rectangular
Those percentages use different source dimensions. Use Square or calculate the retained pixel width and height separately.
Preview the encoded crop
The crop box is a selection aid. Choose Apply, then Preview beside the download action to inspect the actual encoded cropped image, its dimensions and byte size. Confirm that the circle stays round and the intended edge labels are retained, then choose Download. Rebuild the preview after changing the crop.
Previous feature review: October 28, 2026. Original publication date retained.